Hi All - With EoK expansion coming up, it might be a good time to get some guidelines out on how to properly submit images!
Sometime recently (2015?) Sony/DBG changed the default file format for saving screenshots from Bitmap to JPEG. JPEG is a more readily recognized format and consumes less space on your storage drive, however the image quality is much lower than the former Bitmap. You will want to change the image type back to Bitmap to make sure you're only uploading high quality images! Please note that doing this will create one extra step in preparing your images to be uploaded, but it is highly advisable. If you really, really don't feel like it, then you can keep taking screenshots as JPEG files.
To do so:
- Navigate to your EverQuest directory
- Open the file "eqclient" with Notepad (right click on "eqclient", Open With > Notepad)
- Scroll to the bottom of the [Default] section of the file and create a new line that reads: ScreenshotType=bmp
- Now save the file and close it
Awesome - Now you are saving your screenshots as high quality Bitmap files again!
To take a screenshot, use the minus button ( - ) at the top right of the number pad on your keyboard (desktop computers). If you're on a laptop, you might want to configure a different key within the Options of EQ.
Getting The Best Shot
As you adventure in EQ, you'll want to take screenshots of various things you might encounter such as NPC's for quests, names, regular mobs, vendors, etc., ground spawn items, weapon graphics, etc. Here are a few tips for getting the best shot.
Ground Spawns
- Be sure to grab enough of the surrounding environment so people have context of where the item is
NPC's
- Grab enough of the surrounding environment so people have context of where the NPC is located
- Take the screenshot from a front angle; either the right or left. This allows to capture more of the environment and shows more NPC detail
- Have a light source equipped or your Gamma is adjusted not too dark but not too light so you can minimize post editing (if needed)
- Do not have any pets, mercenaries or other PC's in the screenshot to not distract from the subject. Also do not have the NPC's targeted, we don't want 100% shown above the NPC or target rings; that's bad form!
Weapons/Items
- It's is best to use a second character to take these shots so they have direct line-of-sight (LOS; you should already know this term if you're a caster! :p)
- Make sure the lighting is not too bright or dark.
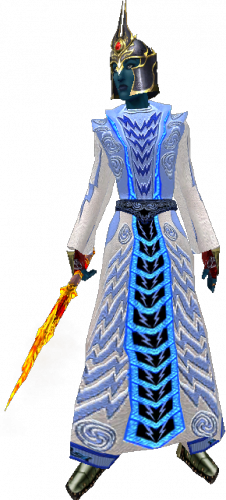
- Stand against a wall to not allow any extra environmental items to enter the shot, this keeps things more standard and clean looking
- Have particle effects on for the PC you are taking the screenshot from
- You made need to adjust height, drop levitation or duck on the PC with the weapon/item equiped, or the PC you are taking the screenshot from so the subject is shot straight on and not from an angle
Your UI might sometimes get in the way of taking nice, big shots. Use the F10 key to hide the whole UI (you can press F10 again to get your UI back).
You can use the F11 button to hide/un-hide the netstat information (green line with numbers that tells you your connection speed to the EQ servers).
You can use F9 to cycle through the camera modes available in game. First person and overhead work really well!
Now that you have a small collection of images you want to upload to Alla, let's go through the editing and uploading steps.
Editing, Naming and Saving
I personally edit every image in Photoshop (I'm a designer by day), but this isn't always necessary or you may not have the expertise to do so. Let's start out with the editing steps for those able or willing to try as these do result in better quality images.
Remember, your images are found in the "Screenshots" folder of your EverQuest directory.
Editing Images for Upload using Image Manipulation Software
- Please only use this option if you are familiar with editing images, I won't be able to provide help on using the software
- There is an open-source program called "GIMP" which works on Windows/Linux. There is no cost and it works like Photoshop. This is a pretty standard program graphic designers use all over the world and is very helpful if you do not have Photoshop.
- Croping: Crop the image so there is enough environmental detail for NPC's or ground spawns (~100px). For weapons, just crop a bit (50px) past the item on all 4 sides.
- Light/Levels: I try to keep things simple and use the Levels adjuster to account for lighting. The auto function works about 50/50 and saves time. Make sure the subject's lighting is well balanced and that any environment in the shot is well lit too; under/over exposed images don't read well
- Image Size: Adjust the image size to 76dpi and 500px x 500px. 500px is the maximum dimension for screenshots on Allahkazam.
- File Type: Save the image as JPEG; this is the most appropriate type for images with lots of colors for web use.
- File Size: Be sure no image is saved larger than 256kb. This helps images load extremely fast.
Uploading Images using MS Paint
- Good ol' MS Paint - If you are not using the above software, you still have to use Paint to save your image to JPEG format
- Since we're not using high-end software, it's very important to follow the steps outlined in the first part of the guide to make sure you have the subject at the right angle, with the right amount of lighting - practice makes perfect on this
- Open your image in Paint
- Save your image as JPEG
Saving & Naming Images
- Save your image out to a new location and using a name you will remember. You could make a directory in your "My Pictures" folder called "Images for Alla" or something like that. I also then make a folder for each year (e.g. 2016, 2017, etc.) and then have two more folders called "NPC's" and "Items" inside each year folder.
- Name your files something you'll remember. For Items, I use "Wurmslayer_Image" for the screenshot of the equiped item. For the stat window, I use "Wurmslayer_Stats".
- When naming NPC's, name them something like "a-clay-golem_The-Foundation". I use the "en dash" (or what most people call a hyphen) for whole unit naming, in this example "a clay golem" and "The Foundaion" and then use the underscore to separate the whole units.
- When naming NPC's, it's very helpful to name it exactly how it appears in game, sometimes one of the words is capitalized while others are lowercase
- When naming NPC's, always add the zone including if it's in an instance as names have been getting reused a lot lately.
Getting your images uploaded to Allakhazam
- To get your images uploaded to the site, follow these steps
- Click the "Add Image" button on the page of the subject you're trying to upload
- Click the "Browse" button and navigate to your saved image. If you are not using software to edit your image, your images will be in the "Screenshots" directory of the "EverQuest" folder on your computer
- Once you've selected your image from your computer, click the "Upload" button (it's just below that "Browse" button you just clicked)
- Now you are presented with an editing page and your image will be shown. Use the blue marker at the bottom right of the image to adjust the image size. Please be careful here, you can use "Shift+Left Mouse Click" to proportionally scale the image. Remember, it MUST be no greater than 500px in height, or 500px in width. Rectangular images (in landscape or portrait) mode are OK; meaning, you can upload an image that is 500px x 300px.
- At the very top of the page, you have the option to add a Caption. This might be used for any misc. information that might not fit on the standard page information areas. I generally use it for named NPC locations, to state Spawn Location 1 , or something like that.
- Now that your image is sized right, you can click the "Commit Upload" near the top left of the page to finish uploading your image. Note there is also a "Cancel Upload" button in case you need to cancel
Congrats! You've just help your fellow EQ players by providing them information to make their gaming life easier.
A few final notes:
- All images will need to be approved by Admin before they show up, so you will need to be patient during expansion releases to see the fruits of your labor.
- Please don't clutter the images with guild names, player names, fancy graphics (which is always bad), fancy borders, etc. You can use a small graphic for your name that is tasteful and of a neutral color (white, gray, tan) in an corner that does not distract from the image
- You can view a few examples of how to make images by checking out this NPC: https://everquest.allakhazam.com/db/npc.html?id=50251
- In the above example, note the amount of environment in my shot so players have context to where a NPC or item is. In this case, she is on grass, near rocks, near cages, a tree and a wall. Also note my small watermark at the lower right corner, in a typeface appropriate for a fantasy game, in white and just near my 1px white border I use
- I ONLY use my watermark on named NPC's, weapon graphics, ground spawns, or other items of significance. I do not use them on standard NPC's that you will always find up or insignificant items like Iron Rations.
One second final note: Please leave any replies/feedback to updates needed to this guide. I only play weekends, so there will be a delay in my assisting.
Is there interest in knowing how to make map locations, especially for named NPC's?
Edited, Sep 25th 2016 9:12pm by Cylius
Edited, Sep 25th 2016 9:14pm by Cylius
Edited, Sep 26th 2016 7:36pm by snailish
Edited, Oct 11th 2016 8:50pm by Cylius
Edited, Oct 11th 2016 8:54pm by Cylius

