eq2 zone:Siren's Grotto: Alluring Embrace
|
| Contents [hide] |
Points of Interest
- Pearlescent Causeway: -206, 2, 0.84
- Sublime Depths: -409, 2, -2
- Sanctum of Bewilderment: -767, -19, -151
- Queen's Chamber: -550, 12, -383
- There is an exit door in this room at -353, 8, -514 . You can also enter the Siren's Grotto: Tavalan Abyss instance from this door.
Heritage Quest
Added in Game Update 67.
Click on the water at 74, 4, 24 in Siren's Grotto: Alluring Embrace (Advanced Solo or Heroic) and follow the dialogue to begin the heritage quest Waters of Norrath.
Walkthrough (Advanced Solo)
All mobs in this zone are at least level 100 heroic. We ran this on a level 95 Swashbuckler equipped in CoE solo gear with a werewolf templar mercenary.
- Head east until you reach Shyneera's room. You may want to clear out the mobs on the outer edges of the room before engaging with her.
- We recommend not using a featherfall item during this battle; it makes the bounce pad part difficult to do.
- See the picture of this room below if you're unsure of what the bounce pads or beams are during the fight.
- Hail Shynerra, wait for her to speak.
- A bubble springs up around Shyneera. You need to deactivate the beams powering it.
- Use the bounce pads around the bubble to jump toward the roof. Land on the narrow rocky edges and click the beams to deactivate them.
- A late in-testing change made the interaction with the beam lights insta-click, so you should be able to deactivate them in mid-air.
- The glowing emitters cannot be damaged, so don't waste time trying to fight them. They will despawn when you deactivate the last beam.
- Kill Shyneera's "pretties" as she sends them at you. Occasionally she'll attack herself.
- During the fight Shyneera will cast madness on you. Run to a waterfall to clear it away.
- During the last half of the battle, Shyneera will become temporarily resistant to ice, divine, and fire damage.
- Continue east into the Sublime Depths. At the bottom of the ramp a message will trigger the summoners to spawn a Coral Construct (100^^).
- You may want healing for this fight.
- Aggro the construct but don't waste your time trying to damage it. Stand right next to one of the non-attackable siren summoners.
- The Coral Construct will emote that it focuses on one of the party members, then corals (a large circle) will begin to grow around that person. Finally, a huge coral will shoot up in the middle. This should hit the summoner.
- The summoner will become attackable; kill it. Do this for all of the summoners.
- Once the last summoner is aggroed the Coral Construct will despawn.
- Head up the ramp to the north. You will come to the Sanctum of Bewilderment.
- Clear all aggros before beginning the named encounter.
- Go north-northeast until you reach Mistress Allura and Mistress Mallora.
- Hail Mallora. The sisters want to play a game.
- You will be teleported from platform to platform. The sisters have extremely high defense (the buff is called Darkwater Sheen) while standing on these platforms. Lure the sisters off the platforms to kill them or use the frog intestines while standing on the platforms to make them disgusting.
- Standing in the water during this fight will drain your health and power (effect: Waterlogged).
- Mallora may do reflective damage to melee DD during her fight. Counter this with spells or ranged.
- Allura is easy to take down after Mallora dies.
- Backtrack to the Sublime Depths. Volot (100^^) will be here.
- He will occasionally wipe all debuffs from himself.
- He will summon you to him if you attempt to kite or run away.
- At about half health, he begins summoning large masses of frogs (about 6-8 at a time). These start out as level 100vv and come out in four waves. The last wave was level 100 straight cons. These waves came quickly and overlapped each other.
- Once the frog brood is dead (or run off), finish off Volot. This will update the mission Amphibian Information.
- Return to the Sanctum of Bewildermint and continue west.
- Kill Queen Dulseris (100^^). She runs through a lot of scripts.
- "Let's see you guard against a flood of fear an terror!" This causes you to run away at a very fast speed.
- "Waters! Heed my call!" Three or four water globules from the waterfalls will move toward the queen. Attack them before they reach her to absorb them yourself and prevent her from gaining benefit from them.
- "Sirens of the grotto! Protect your queen!" "A barrier of corals forms around the queen!" The barrier is attackable--destroy it. Defeat the barrier before the sirens, otherwise they just keep spawning. To target the barrier click on the queen.
- "Waters of the falls! Heal me!" Queen Dulseris will be healed some (around 20-25% we think).
- "You sense Queen Dulseris staring at you with madness in her eyes!" "Careful where you tread, landwalker." Avoid the waterspouts that sprout up on the platform. One hitting you will deal over 6.5k focus damage.
- "This is not the end...." "Subjects of Fear converge upon the grotto to protect the queen's escape!" You'll be attacked by three Tavalan mobs. The queen becomes non-attackable. Kill the Tavalans. This will update the quest Cry of the Siren.
Helpful Items
- Kill grotto skippers and loot the Pile of Disgusting Frog Intestines. You should be able to use this against the sisters (in the Sanctum of Bewilderment). It is not necessary to use them, but it trivializes part of that fight, so we recommend collecting as many intestines as you can.
Sublime Depths
- Clicking the coral at -893, -65, 15 will give you Brain Coral Cerebrum, a one-use item that increases your power by 25%.
- Clicking the coral branch at -863, -66, 166 will give you Staghorn Coral Branch, a one-use item that heals you for 25% of max health.
Sanctum of Bewilderment
- Clicking the coral at -787, -21, -362 will give you Organ Pipe Polyps, a one-use item that inflicts 30% max health damage to your target.
Queen's Chamber
- Clicking the coral at -541, 6, -354 will give you Brain Coral Cerebrum, a one-use item that increases your power by 25%.
- Clicking the coral branch at -297, 6, -325 will give you Staghorn Coral Branch, a one-use item that heals you for 25% of max health.
- We found a forgotten vase at -307, 7, -241 . Destroy and loot it for roughly 47g .
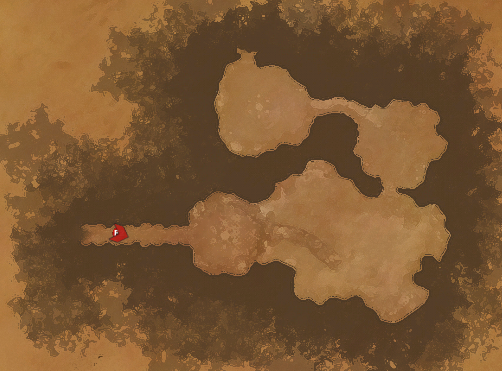
Shyneera's Fight (click to enlarge)
| Game Update #66 |
|---|
|
This page last modified 2013-07-23 09:37:35.
© 2025 Fanbyte LLC