How to Create a New Object Page (Rift)
Object pages are for objects you can see in-game as part of the landscape. For example, items to pray at, or gathering nodes.
| Contents [hide] |
1st Step: Creating the Page
at the top of your browser you should see your address bar, where the url is for this page. you should see a url like "http://rift.zam.com/wiki/Learn_How_to_Create_a_New_Object_Page_(Rift)" replace the part after "/wiki/ with a name like these examples:
- http://rift.zam.com/wiki/Tin Vein (Rift Object)
- http://rift.zam.com/wiki/Planar Reducer (Rift Object)
| Hint | Remember to keep the "(Rift Object)" part at the end of the link, this makes sure the page doesnt disappear in the ZAM universe. Make sure the Name of the NPC is spelled correctly. |
|---|
Now press enter to load the page. If the page exists already the article will appear. If not you will see a message like this below.
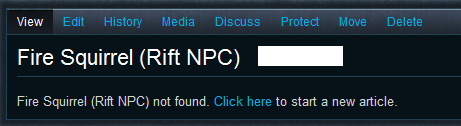
Click the link "Click Here" or the "Edit" link to open up the edit view. You should now see a big white box, this is where you write or edit all content on the article. You have now created the page.
2nd Step: Adding In the Template
We have this awesome tool to help things look pretty with minimum work on your part. Copy the below text and fill in the correct information after the = sign. The essential field is "zones". Make sure you spell the name of the zone/s correctly and no spaces after or before the word.
{{Rift Object
|zones=
|type=
|quests=
|craft=
|requiredskill=
|trivialskill=
|}}
For in-depth instructions, see the template page at Rift object template.
Remember that this should be the first thing on the article's edit view. After these lines are added you can add any content and text you want into the article.
This template adds in a screenshot if one has been uploaded to this page and adds a related links box for other fansites.
3rd Step: Adding in a Screenshot
| Hint | Check out Photography Master Guide for cool tips and extra help to improve how you take screenshots. |
|---|
At this point go to the bottom of the page and click "Save". Dont want you losing your work dont we?
At the top of the page you can see the menu with View, Edit, History e.t.c you can click "Media"
(Check out mob:Fayne Doran for a nice example of how to make a screenshot look like.)
- Click "Add Image" this will bring up a bix for you to select a file to upload.
- The next page is the zam Image Editor. At this page you can resize you image. (drag the blue corner) or crop the image,(drag the little green boxes at the image corners). Make sure the image isnt larger than the green dotted line box.
- Click "Commit Upload"
- Wait for an admin to review your screenshot
Once this is all done and an admin accepts the screenshot it will automatically appear in the article (if step 2 was done)
4th Step: Adding Extra Content
- Return to the edit view by clicking "Edit" in the menu above the article header.
- Making Headers
Example:
- ===This Becomes a Header===
Some Popular Headings:
- ==Related Quests==
- ==Dialogue==
- ==Quests Given==
- ==Related Achievments==
Links to Items, NPCs and More
Remember to check out How to Make Links in Articles to find out what to type to make a link connect to another article.
|
